In the “Name” field, enter a name for the Calendar. For example, Events, Council, Art and Culture, Recreation, etc. The “Display Name” will be the name that appears on the public website. We recommend making the name and display name the same.
Learning Centre
Add a Calendar
You can add a calendar to your website using Govstack Events. Before you can add a new calendar, you'll need to create a field set.
Set-up instructions
In the back office select the 'Events' section from the Govstack dashboard. This will take you to the Govstack Events “Home” page.
To add a calendar:
- Select “Configuration” from the Govstack Events toolbar located near the top of the page
- Select “Calendars” from the navigation menu on the left
- Click the “Add Calendar” button and this will take you to the “Add Calendar” page
- Select the “Save” button once you've completed all necessary fields
Complete each necessary field on the Add Calendar page.
Choose the field set for this calendar from the dropdown “Field Set” menu. You should create a new field set before you add a new calendar. The field set determines the information that users will need to provide when adding an event to this calendar.
This “Colour” field can be left blank.
Determine subscription options
Set the “Subscribe To” field to the “Category” from the dropdown menu. This determines how events are grouped in the subscription options.
If you'd like to allow members of the public to add events to the calendar, you should select the “Allow Public to Post” checkbox. All events added by the public will go through an internal approval process.
Adding event categories
As a calendar administrator, you can create new event categories for a calendar, customize the category display names for an event and choose which event categories get pulled onto the homepage calendar feed.
To add a new event category to a calendar field:
- In the Govstack back office, select the 'Events' section from the dashboard.
- Click on the 'Configuration' option on the toolbar at the top of the page
- Select 'Field Sets' from the list
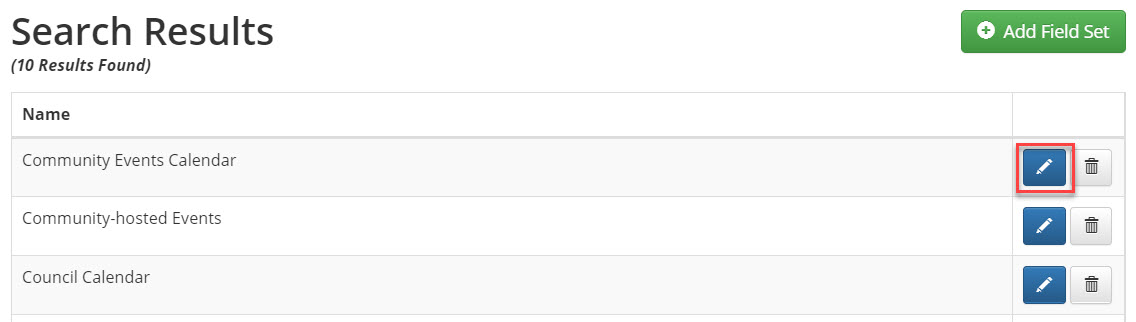
- Under 'Search Results', find the Calendar you would like to add a new category to. Click the edit icon next to it.
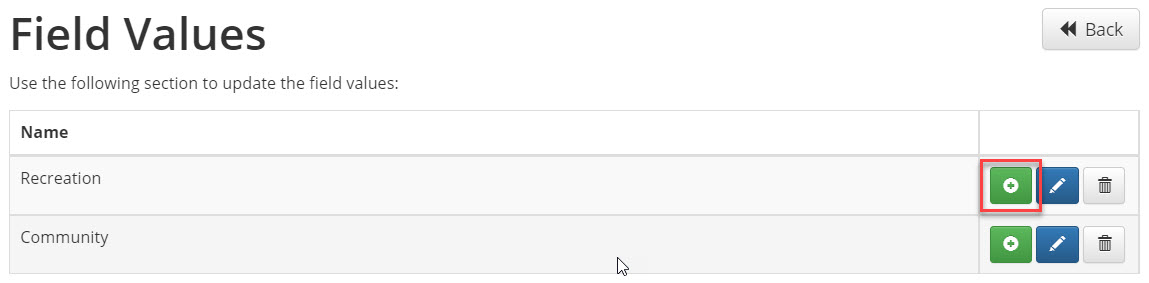
- Scroll down to the 'Fields' heading and click the 'Field Values' icon under 'Category'

- Add a new category field by clicking the 'Add Field Value' button next to any of the categories already in the list
- Select which pre-existing category you want your new one to appear under and name your new category in the 'Value' text box. You can assign a colour to the category so it appears as a separate colour in the month view
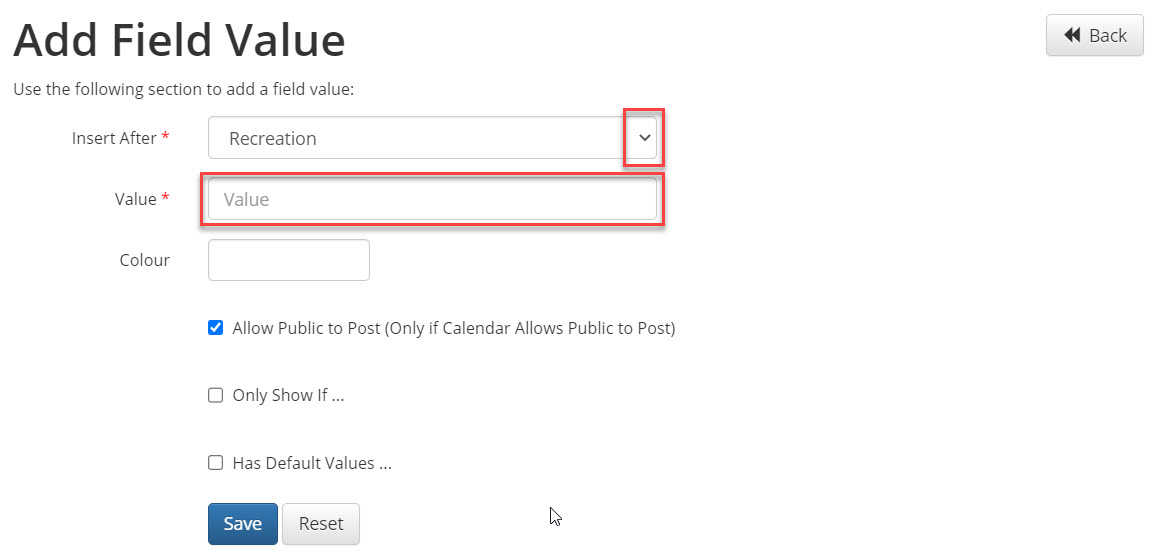
- Click 'Save' to create your new event category
Edit category display names for an event
You can customize the display name for the category fields in your events without breaking any functionality.
To change a category display name:
- In the Govstack back office select the 'Events' section.
- Click on the 'Configuration' option on the toolbar at the top of the page
- Select 'Field Sets' from the list
- Under 'Search Results', find the calendar you want to edit a category display name for and click the edit icon next to it
- Scroll down to the 'Fields' heading and find the category field you want to rename. Click the 'Update Field' icon next to it the category field
- Edit the category name in the 'Display Name' text box
- Click 'Save' to confirm the display name change
Configure views and templates
After you've added a new calendar, you'll need to configure the calendar view. We will provide you with a default template as a standard feature with Govstack Events.
Contact Us
GHD Digital Support
Primary +1-866-691-5528
Secondary +1-519-884-2476
Submit Online
Need Help?


