Add a unique name for the subpage listing in the 'Name' field. This will make it easier to identify this specific subpage listing in the back office of Govstack, especially if you have more than one subpage listing on a page.
Learning Centre
Subpage Listing
The Subpage Listing component lets you add a page directory to a web page which displays links to all the pages in a certain section of your website. This directory uses page names and summaries to introduce and link off to those pages.
If you add, remove or make changes to pages under the vertical or parent pages linked in a subpage listing, these changes will automatically be reflected in the subpage listing.
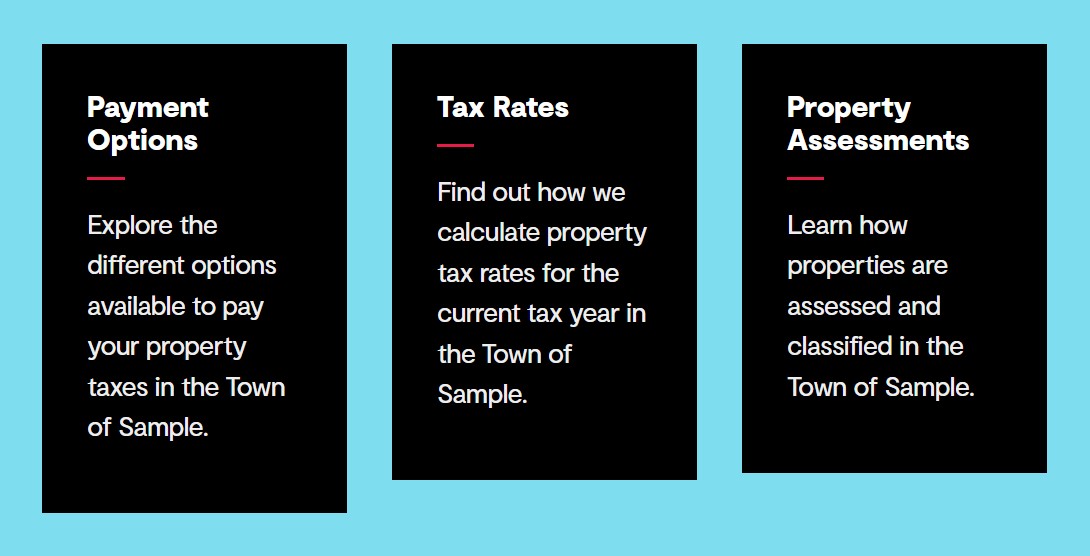
Example of a Subpage Listing component
Here is an example of what a subpage listing on a property tax parent page could look like. There is a box for each child page that includes the page title and summary and links to the page.
Add a subpage listing
To add a Subpage Listing component to a page, you need to:
- Navigate to the page you'd like to add a subpage listing to
- Select the 'Add content' button under the 'Main content' area of the page 'Content' tab
- This will open the 'Add content' slide-out panel
- From here, select the 'Subpage Listing' component
- Under the 'Content' section next to 'Link to listing', select 'Add'
- Select 'Add Link'
- Select the link to the internal page you want to use for the subpage listing. For example, you would select the "Property Taxes" page if you want to display links and summaries to all of the pages that fall under Property Taxes in your website menu.
- Select 'Submit'
- Repeat these steps for any other pages you want to create subpage listings for. If you choose more than one page, tabs will appear to switch between page listings
- Select 'Submit' to complete the process
Please note
If you would just like to link the page names and not include the page summaries, you can leave the summary field blank on each page.
Subpage listing settings
You can adjust the look and layout of your subpage listing through the settings tab. To access the settings, select the 'Settings' tab located at the top of the 'Subpage Listing' slide-out panel.
Review each of the Subpage Listing component settings to learn more.
Choose how you would like the title and summary for each page listing to be displayed. You can have the title and summary appear above, below, next to or over top of the page summary image, if one has been selected. If there is no page summary image, then there will simply be text boxes for each page in the subpage listing.
If you would like to add a background colour for each page in the subpage listing, turn on the 'Add background colour' toggle. Below, next to 'Background colour', select the colour you'd like to use. You can also add a background colour behind all of the pages in the subpage listing with the 'Content colours' setting.
Colour options
The colour options are based on the design of your website. You may be able to change the design colours depending on your Govstack plan. To get access to the website design features, speak with your GHD Digital Account Executive.
Choose how many pages you would like each row of the subpage listing to display. You may want to provide more space for pages with longer summaries and images. Experiment with different items per row to find the look you like best.
With the 'Item heading size' and 'Item secondary heading size' settings, choose how large you want the headings (and subheadings, if applicable) to be for each page in the subpage listing.
Next to 'Item text alignment', select how you want the headings and summaries for each page in the subpage listing to be aligned. We recommend left aligning most content to be the most accessible for North American audiences.
A subpage listing will automatically add space between each page listed. If you would like to remove this spacing, turn on the 'Remove item spacing' toggle.
Even if a page has an image added to its summary, you can choose not to display the image in the subpage listing. To do this, turn on the 'Hide image' toggle.
In the 'Image style' setting, you can choose which shape you want the images in the subpage listing to be.
If you select 'Original', then your images will appear with their original ratios on the page. Keep in mind that different images may have different ratios, so the subpage listing may display images of different shapes if you select this option.
If you select one of the ratio options, then all the images in the subpage listing will display in that ratio. The first number in each ratio represents the width while the second number represents the height. For example, a 2:1 image would be twice as wide as it is high.
If your images are cropped oddly or don't look the way you want them to after adjusting the image style, you may need to change their focal point so that they crop properly when changing the image ratio. Learn how to change the focal point of an image in your gallery in the 'Media' tab in the Govstack main menu.
After you select an image style in the 'Image style' settings, your subpage listing images will automatically be cropped to match your selection. However, you may prefer to have your images retain their original ratios while still having a consistent ratio display. To do this, turn on the 'Box pad' toggle to add padding around images to match the image style you have selected.
Next to 'Pages to display', you can select how many of the child pages from the parent page link you have chosen you want to display in the subpage listing. If you want to display all the child pages, then leave this area blank.
You can set up the subpage listing to list all the child pages in the order they appear under their parent page, or you can have them appear in a random order every time a user visits the page. If you would like the pages to appear in random order in the subpage listing, turn on the 'Enable random order' toggle.
We recommend keeping the original order to make it easier for users to navigate through your website. Typically, pages should be listed in alphabetical order and match the order they appear in the side menu.
You can set up your subpage listing to display in carousel mode where it displays pages in a single row and cycles through them at regular defined intervals. To have your subpage listing display in a carousel, turn on the 'Enable carousel' toggle.
Allow users to scroll through a carousel
If you want users to be able to scroll through a subpage listing carousel themselves, rather than waiting for it to auto-scroll, you can either:
- Add left and right arrow buttons that users can select to move through the carousel. To do this, turn on the 'Show arrows' toggle
- Add clickable dots below the carousel gallery that users can select to view any page in the subpage listing. To do this, turn on the 'Show dots' toggle
Set the carousel rotation speed
Next to 'Auto rotate speed', use the slider to choose how often the carousel will automatically rotate pages. You can choose anywhere between one and 10 seconds.
You can customize the content colours of the subpage listing using the colours that are part of your website design. Depending on your website design, you can add a coloured background behind the subpage listing.
Colour options
The colour options are based on the design of your website. You may be able to change the design colours depending on your Govstack plan. To get access to the website design features, speak with your GHD Digital Account Executive.
If you'd like, you can add an image to the background of a subpage listing. To do this, you need to:
- Select the "+" icon next to the "Background image" field
- This will open the 'Media' folder
- From here, choose the folder that contains the image you'd like to add
- Select the image you'd like to insert
- Press the "Select" button
Please note
Adding an image behind text can cause colour contrast issues for users with low vision or colour blindness. You should only add an image behind text if it meets the colour contrast ratio requirements associated with accessibility legislation in your region.
Background image options
You can also set a few options for a background image, including the placement of the image, size of the image and whether or not the image repeats. We recommend testing out the different options until you find the one you like the best.
This setting only applies if you are using a page with a 'Full' page layout. Typically full page layouts are reserved for the home page of your website or any landing pages you've created.
If the page you are adding a subpage listing to has a 'Full' page layout, choose how much of the page width you would like it to occupy.
You can add animation to the subpage listing by selecting the 'Animate' toggle. Once the 'Animate' toggle is selected, you'll have the option to customize the:
- Animation style
- Animation delay (seconds)
- Animation duration (seconds)
Animation style
From the 'Animation style' dropdown menu, select the type of animation you'd like to add to the subpage listing. There are a variety of different animation options in the following categories:
- Attention Seekers
- Bouncing Entrances
- Fading Entrances
- Flippers
- Light Speed
- Rotating Entrances
- Sliding Entrances
- Zoom Entrances
- Specials
We recommend testing out a variety of animation styles to select the one you like the most.
Please note
Animation styles can cause accessibility issues for some users visiting your website. For example, some users may experience motion sickness when viewing animated elements on your website.
Animation delay
Using the 'Animation delay' slider select the time in seconds that you'd like to delay the animation.
Animation duration
You can select how long you'd like the animation to last on the subpage listing by using the 'Animation duration' slider. Select the number of seconds you'd like the animation to continue on the public website.
You can create an anchor link that will link a user to this specific part of the content page. If you'd like to create an anchor link to the subpage listing in the future, you can add a unique name in the 'Anchor name' field.
In the 'Custom classes' field, you can add any custom CSS classes you may have. Custom CSS classes can be found in the Design node under the 'CSS' tab in the backend of Govstack.
If you'd like to add more than one custom class, you'll need to leave a space between each class.
Please note
Depending on your Govstack plan, you may not be able to access the Design node in the backend. If you'd like to be able to add custom CSS and get access to the website design, contact your GHD Digital Account Executive.
You can select additional styles for the subpage listing, including:
- Spacing
- Visibility
- Design
Spacing
You can remove the spacing around the subpage listing by selecting one of the following options:
- Remove spacing
- Remove spacing top only
- Remove spacing bottom only
Visibility
You can customize the visibility of the subpage listing. Select one of the following options:
- Hide on all screens
- Hide on extra small screens
- Hide on small screens
- Hide on medium screens
- Hide on large screens
- Hide on extra large screens
Design
Select one of the following options if you'd like to customize the design of the subpage listing:
- Show shadows - this will add a shadow effect to the subpage listing
- Sticky - the subpage listing will stay on the screen even as users scroll down the page
Turn on the 'Hide from website' toggle if you'd like to hide this component from the web page.
Add a summary to a page
Learn how to add a summary to a page that your subpage listing can use to provide a brief introduction for the pages listed in with the Subpage Listing component.
Preview and publish changes
Once you've added a subpage listing to your page, make sure to preview and publish the page to complete the process.
Contact Us
GHD Digital Support
Primary +1-866-691-5528
Secondary +1-519-884-2476
Submit Online
Need Help?


